
Learn how to make coconut oil at home from dry coconut step by step. I also show you how much oil I got and the best tool and book you can use to make seed oils at home!
How to Make Coconut Oil at Home from Dry Coconut Step by Step
Here’s how to make coconut oil at home from dry coconut step by step:
- Get at least three dry coconuts and remove the fibrous husks on the outside
- Using a strong hammer, smash the coconuts on a clean, hard surface OR smash each coconut while holding each coconut with a thick cloth
- Use a small knife to remove the coconut flesh from the shell
- Cut, slice or chop the coconut flesh into small pieces
- Dry the pieces of coconut using either a dehydrator or by air-drying for about three days
- Assemble the Piteba oil press and periodically add pieces of dry coconut flesh to the inlet
- Turn the handle and watch the oil flow into your container
- Let the oil settle and clarify for a few days then decant into a clean, dry storage bottle.
Can I make Coconut Oil from Dry Coconut?
Dried coconut is loaded with oil. 1 kg of coconut flesh can give an average of 200 mL of oil! So, you won’t lose if you choose coconut as your source of homemade oil for both cooking and cosmetic purposes.
What part of the coconut is used to make coconut oil?
The dried coconut has several parts such as the fibrous outer husk, the inner shell and the white flesh. When you are seeking to make coconut oil, it is that white meat that you want to take out and use!
Uses of Coconut Oil on Skin and Hair
Coconut oil is good for you both inside and out. As a cooking oil its high smoke point makes it an excellent frying oil. It is thought to offer some health benefits too, like:
- improving heart health
- preventing Alzheimer’s
Other uses of coconut include:
- oil pulling – this is where you swirl a small amount of coconut oil in the mouth. Some schools of thought believe the antibacterial properties of coconut oil can pull impurities from the mouth and improve overall oral health.
- How much coconut oil for oil pulling? Try about a tablespoon of it and swish it around for about 15 minutes
- for hair and skin – coconut oil has both anti-inflammatory and antifungal properties. I have used it to relieve rashes on my children’s skin!
- for pets
- Benefits of coconut oil in dogs and cats – Some pet owners add small amounts of coconut oil to the diet of their dogs and cats. The aim is to improve their overall health and to strengthen the immune systems of their animals.
How do you Make Coconut Oil Step by Step?
Step 1 – Get dried coconuts and remove the outer husks
My first step to make coconut oil at home is to get some dried coconuts! For this time around I was able to get my hands on three nice ones.

My husband had already used a machete to remove the fibrous husk, so it was now over to me to get the shells open.
If you’re not so fortunate to have someone else do the first step, I suggest getting a nice, strong butcher knife like the one below. If it’s strong enough to cut bone, you’re on the right track!
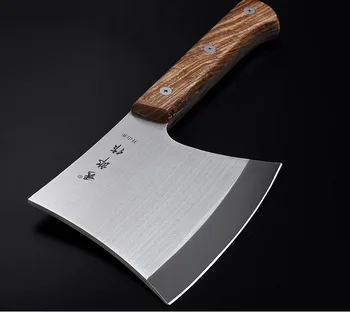
Just be very careful!
Step 2 – Break open the hard inner shell
The second step is where the hammer seen in the previous picture came in. I held the coconut with a thick cloth and knocked it with the hammer a few times. I didn’t use any special technique – I was rather primitive about it.

Just make sure you have a container ready to collect the coconut water that will come oozing out.

Step 3 – Remove the flesh from the hard inner shell
This has always been the hardest part for me. When my husband does it, he makes it look so easy!
But anyway, I got a knife and pushed and prodded until the white flesh broke off – eventually. But be sure to use a dinner knife or something else that’s NOT SHARP! There might be an occasional slip, and you don’t want to cut yourself in this process.

Step 4 – Chop the coconut flesh into smaller pieces
This is the easier part of how to make coconut oil at home from dried coconut.
You have several options to do this. I used a knife (sharp knife this time) and cut the pieces into cubes. I had also tried using a grater, but the labour seemed too much without any added benefit.

You could also go for this kitchen chopper.

Imagine the speed and convenience you can achieve by just putting your big coconut pieces under it and clamping down! Sweet!
Step 5 – Dehydrate the chopped coconut
Again, you have some options for dehydrating.
- You can sun/air dry for a few days. This works out ok as long as you keep the chopped coconut pieces well aerated and away from moisture. Otherwise, they will grow fungus QUICKLY and all your hard work up to this point will have been in vain. (Ask me how I know!) By the way, the pieces will go from a very milky white colour to a dull, almost brownish-greyish colour.

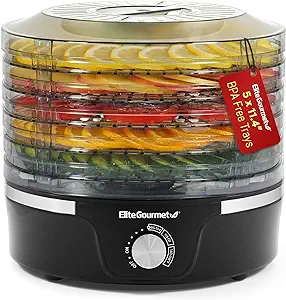
- Another option is to use an electric dehydrator so you can skip the extended waiting period
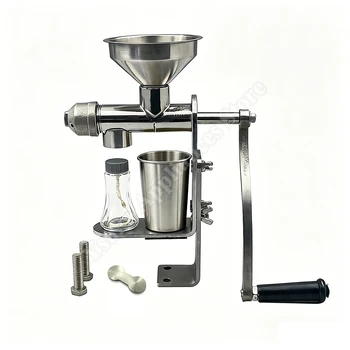
Step 6 – Assemble your Piteba Oil Press to make coconut oil at home
Now we can begin to see the light at the end of how to make coconut oil at home from dried coconut!
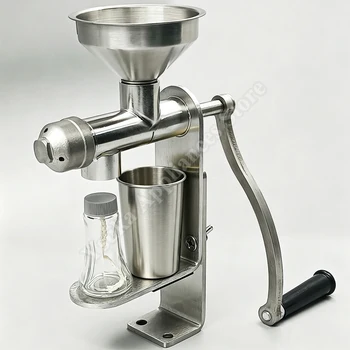
For this step you will need a Piteba manual oil press, a container to collect your oil and another container to receive the waste.
This is what the final setup looked like:

As you begin to turn the handle and feed pieces of coconut into the inlet, give it a few minutes before the oil will start flowing and the waste coconut will start being extruded. It is BEAUTIFUL to watch!

Step 7 – Collect the coconut oil and let it settle and clarify
Once all your pieces of dried coconut have been used up, leave the oil to settle in a container because it will initially have a cloudy appearance.


In the meantime, disassemble and clean up your Piteba oil press. I used no water or soap for this – just the residual oil and a wire brush! (I have had bad experiences with water causing rust.)
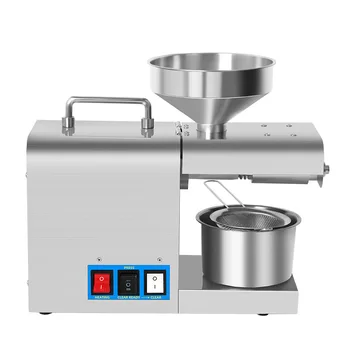
Here’s a stainless steel oil press option, though:
How long does Homemade Coconut Oil last?
Now that you have your precious homemade coconut oil, you may be wondering how long it will keep without going rancid. If you keep your homemade coconut oil in a cool dark place you can expect it to last for at least a year and even possibly up to 5 years!
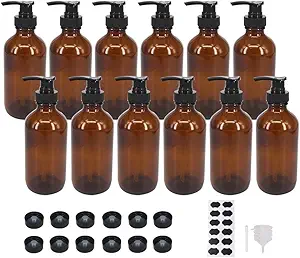
Storing your homemade coconut oil in an amber glass bottle will help to extend the shelf life of your homemade coconut oil because it prevents exposure to UV rays that can cause auto-oxidation, i.e. cause it to go bad.
If you’re making coconut oil at home only occasionally, two 8oz bottles will suffice. But if you’re thinking of making a business out of it or just want to have a lot on hand for your family, stock up on more of these amber glass bottles. I also highly recommend getting amber glass bottles with a pump cover. They make life so much easier when you’re ready to use your homemade coconut oil!
![]()

Resources for Making Coconut Oil at Home
If you’re looking for a good, reliable manual oil press, the Piteba is the way to go. My only downside is the rust problem, but it still works!
If you’re not going to bother contending with rust, I suggest you go for a stainless steel option.
Here’s the manual one like I showed you before:
But if you’re really going for a business, check out this electric oil press (also stainless steel!):
And these oil presses are not just good for making coconut oil at home from dried coconut – there are many seeds you can use – I have used it for castor bean oil, moringa oil, sesame seed oil, and even sweet sop seed oil!
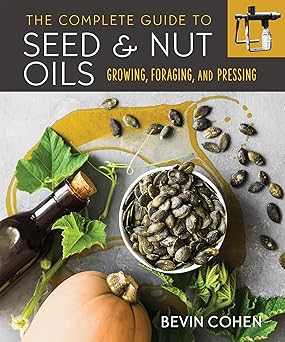
Here’s a book that will help you go all out with a new Piteba oil express machine!
What oil would you use the Piteba to make? How do you use coconut oil in your home?
Leave your answers in the comments!

